
French Baguettes
- Brent's Bread

- Apr 11, 2020
- 6 min read
Updated: Apr 27, 2020
Now that your sourdough starter is happily fermenting away, you don't want to wait to start making bread. Let's start with a bread with very few ingredients but some techniques and tools that will help you make better bread for years to come. This bread has a starter like sourdough but it only takes a few hours to ferment, not four days. Their are many different types of starters. This one is called a poolish which was invented by Polish bakers, hence the name. It is also called a sponge by some bakers. In the 1920's the French began to use a poolish when making baguettes. The result is a bread that rises better and has heavier texture and a tangy aroma. And the best part....These loaves cost ten cents a piece to make! Let's look at the ingredients.
Poolish
strong wheat flour 300g
water 300g
instant yeast 5g
Finished Dough
strong wheat flour 700g
water 300g
instant yeast 6g
sea salt 16g
Makes four loaves
That's it! Flour, water, yeast and a little salt. Now comes the technique. Did you happen to notice that the flour to water ratio of the poolish is 1:1 just like the sourdough starter. Most starters have this ratio of flour to water while some other breads like ciabatta may have slightly more water at 1:1.2.
Making the Poolish
It is important that your water be between 85 and 95 *F. There are several good probe thermometers you can use to ensure your water is neither too hot (it will kill your yeast) or too cold (it will not activate the yeast for a long time). It will soon become a skill you will learn by touch. You want the yeast to begin reacting with the moist flour right away.
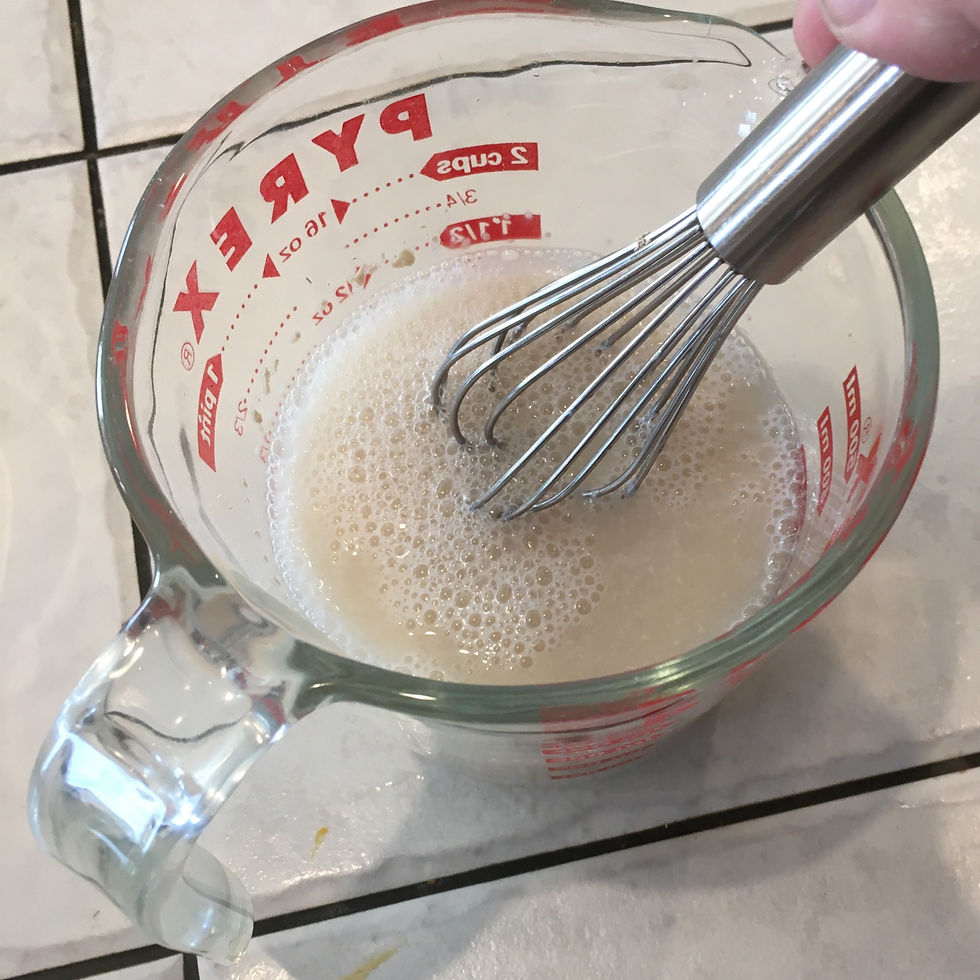
Put the flour in a stainless steel mixing bowl (or as I do, weight the flour into the bowl). With a small whisk, begin whisking the water rapidly while gently pouring in the yeast. This helps all the yeast to dissolve fully in the water.

Pour the mixture over the flour and stir until the dough is saturated and you have a consistent ball of wet dough. I reference a wonderful tool for mixing the poolish in Sourdough Starter you may wish to invest in. Cover the bowl with cling wrap and let sit in a warm place for 3 to 4 hours or in the fridge for at least 11 hours. This step literally takes minutes to complete. What do you do for the next 4 hours? Anything you want. Go shopping, go to the gym, pick up wine, read a book, sleep, the possibilities are endless.

In about 4 hours at room temperature your poolish should look something like this. It will be light, airy and sticky.
Final Dough Mixture
You can knead your dough by hand if you choose. In fact, studies have shown that testing the bread of a hand kneaded loaf will show traces of the enzymes on the baker's hand. Similarly, tests on the baker's hands has traces of the enzymes of the bread he makes. Some believe that the idea of the "hand of the maker" influences the taste of the final outcome and that each baker's bread has its own unique flavour. I prefer the stand mixer as it allows me to prepare for the next step while the bread is kneading.
With a wooden spoon or spatula, scrape the poolish into your stand mixer bowl. Add the flour. Whisk the yeast into the water as before and pour it over the flour and poolish. Keep a little water and flour handy during kneading should the dough appear too wet or dry. Use this reserve sparingly. Mix with a dough hook on medium low speed for 8 to 13 minutes. Check the specs on your mixer. My KitchenAid says to not knead bread dough on the lowest setting. As well, mixers may have varying kneading abilities that can cut the time down to as much as a half, in this case 6 to 7 minutes. Your dough is finished when it passes the "window pane test".

Cut off a small piece of dough and test for elasticity. Then stretch it very slowly to be sure it can hold a "membrane" without tearing. Now add the salt and increase the speed. Knead for another 4 to 7 minutes.

Grease a lidded plastic container with spray oil or olive oil. Now weigh it. I use a 6 quart container. It weighs 455 g with the lid. (If you do not have one this size yet, use the largest metal bowl you have.) Form the dough into a ball by pushing your fingers into the underside while stretching the top taunt. Place it inside the container, attach the lid (or cover with tea towel) and roll it around to get the dough cover with oil. Let sit for 90 min. Weigh it and subtract your container weight to get the dough weight
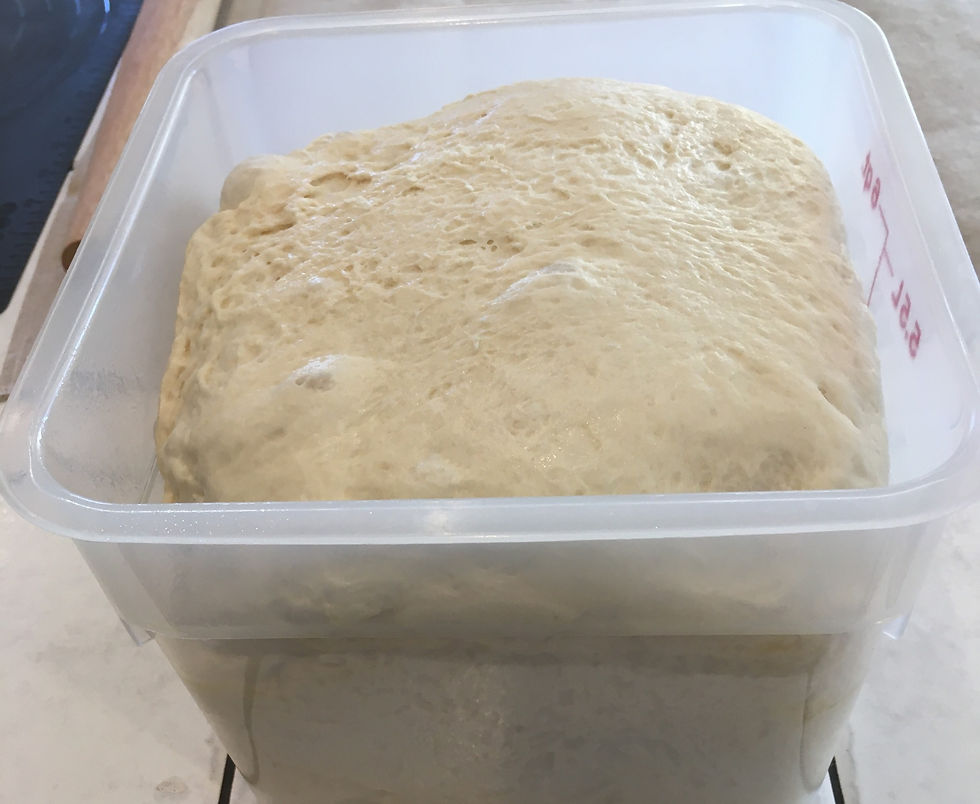
Now you know why I have a 6 quart container to rise my dough. The top of the dough reached the lid. Restaurant supply stores have a lot of the tools you will see me use. Find the ones that work for you and start collecting them. You won't regret it.

Shaping Loaves
Turn the dough out onto a floured surface. I use a silicon bakers mat. It holds flour really well. Just throw a bit on and work it in a circular motion with your hands. Wax on....wax off. Now we have to divide the dough into four equal pieces.
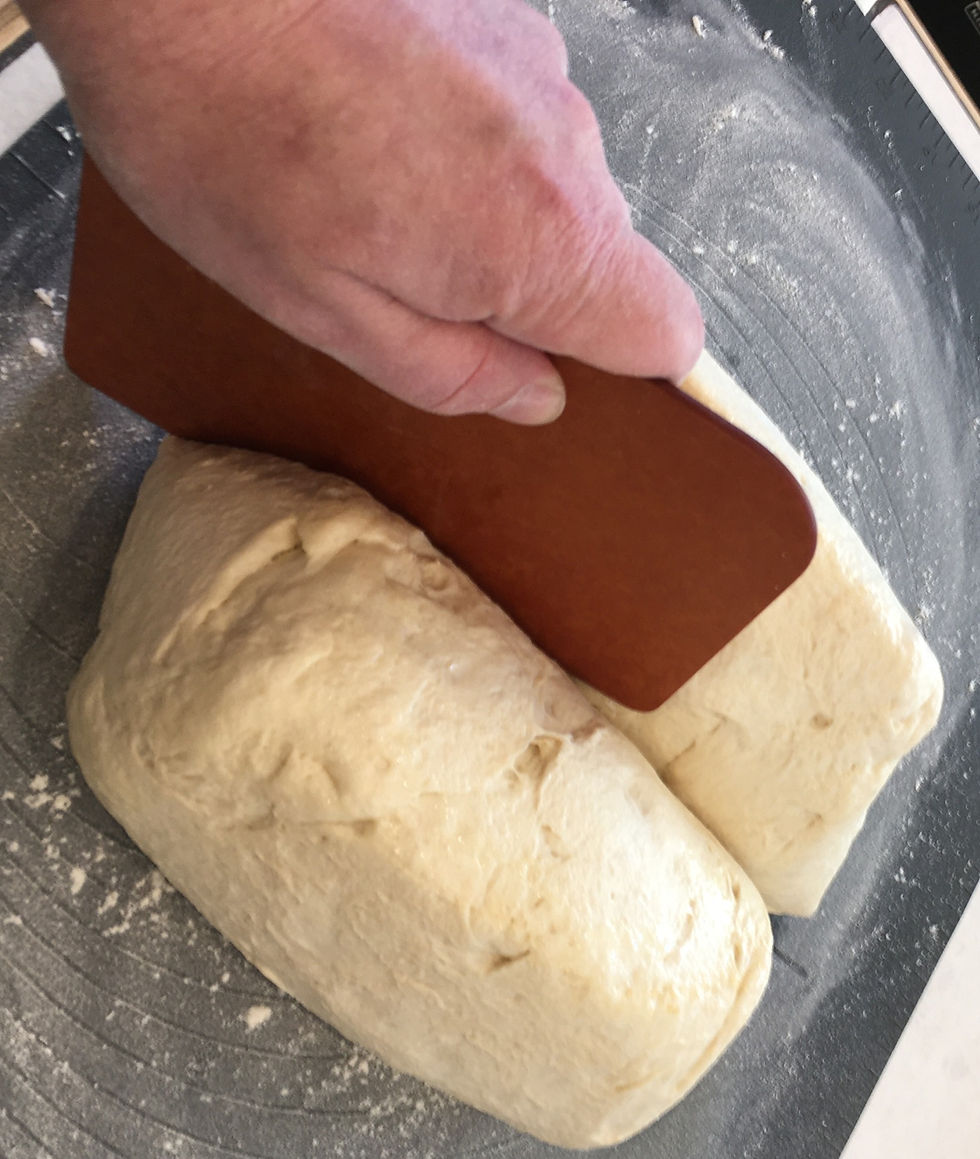
Using a bread cutter, (I like the polymer type as opposed to the metal ones) cut the dough as best as you can in half. Weigh them and transfer the required amount to make them equal. Do the same to each half.

Working with the piece one at a time, roll it out to a rectangle about 12" wide and 8" tall. Then fold it like a letter going into an envelope. Proceed with the other three. Place them seam down on one side of your surface.

Roll each from the centre outward to create a long thin baguette.
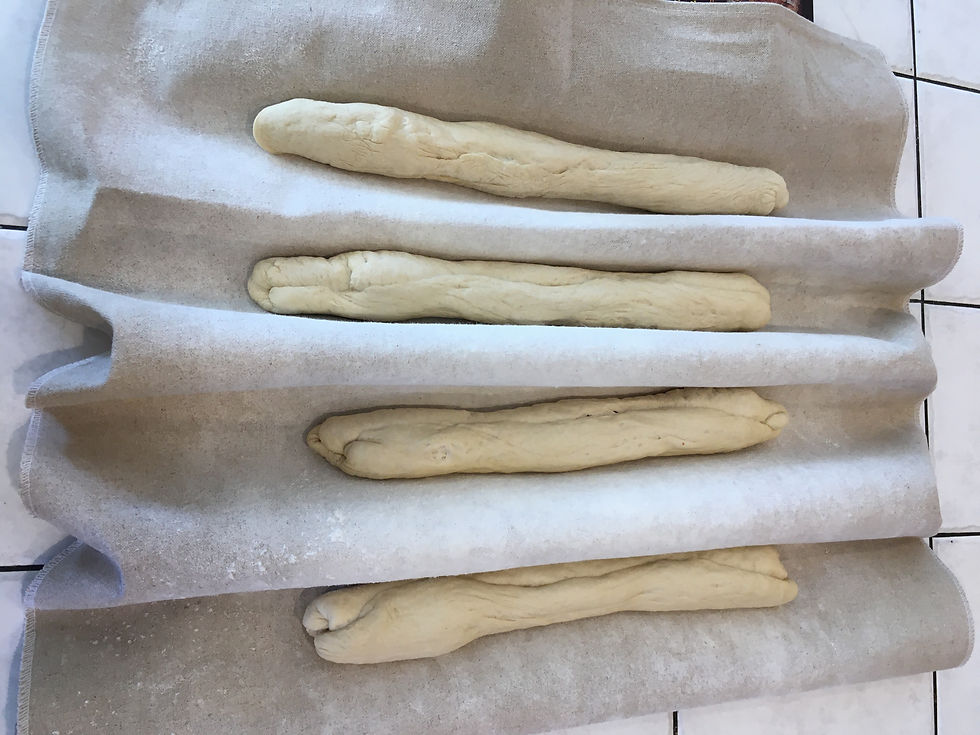
Your loaves now must be placed seam up to rise for 75 minutes. This piece of clothe is called a couche (pronounced coo - shay) . In French, couche means bed which you might recall from the 70's disco hit Lady Marmalade. You have an ear worm now. You're welcome. The couche is made from flax linen and is never washed. Pulling up between the loaves forces the dough to rise upwards.
You can rise your loaves how ever you like. You can put them on a baking pan lined with parchment. You can make your own couche from old bedding with a high thread count. How ever you choose, you must be able to transfer them to your baking surface with relative ease so as not to knock any gas out. If you are using a baking tray and will be baking with this tray, place the loaves seam down. At the one hour mark, preheat your oven to 465 *F.

More fancy tools. These are baguette baking trays. Their curved design allow for slowly and gently rolling the loaves onto the tray. The loaves naturally land seam down for baking because you let them rise seam up..
You can also cook on a baking stone that you have preheated with the oven. This will require the dough to be turned onto a peel in order to get it onto the hot stone. Stone bake bread is quite tasty though.
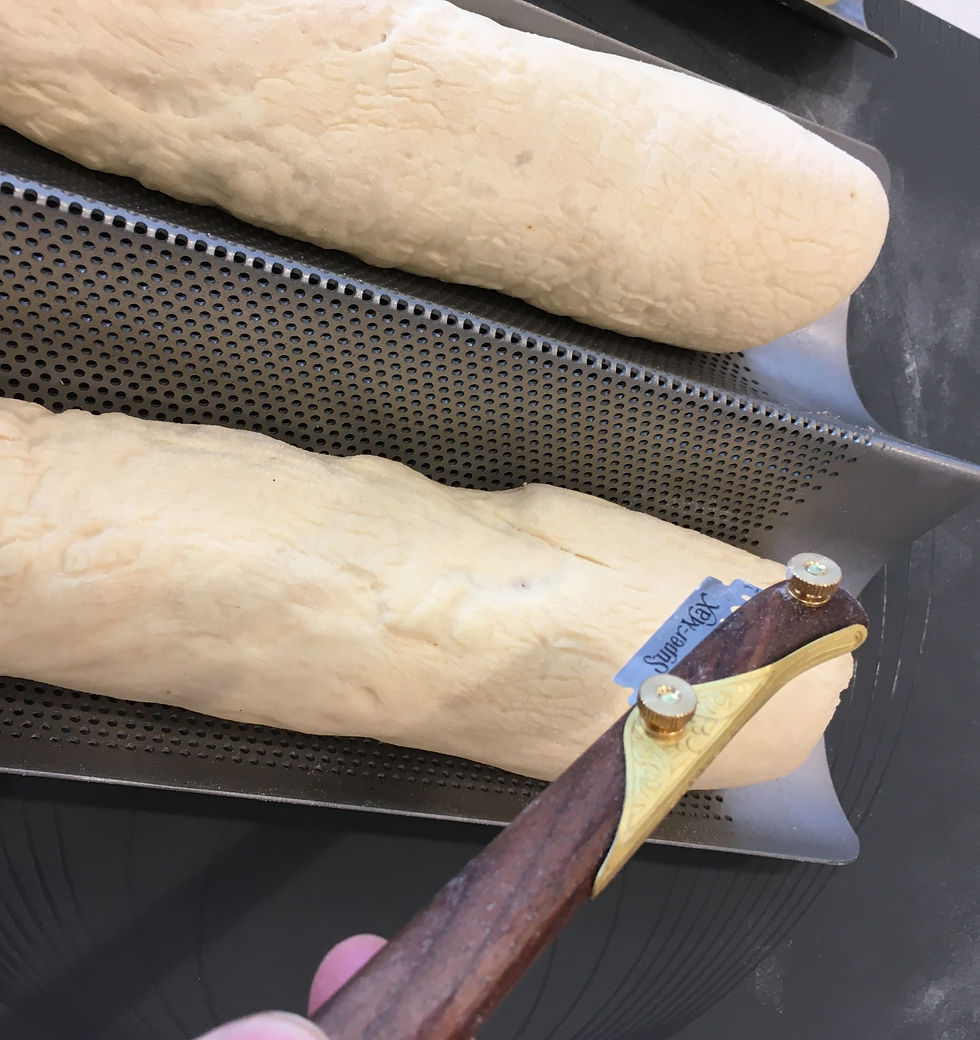
With a bread razor or other razor sharp cutting tool (sanitized for the purpose), make four diagonal slashes, 1/4" deep, on each loaf. If you wish, you can mist them with water and sprinkle sesame or poppy seeds, even herbs on them before they go in the oven. This bread razor I found at Williams Sonoma.
Baking Loaves
Put the loaves in the oven and spray the interior walls of the oven generously with water before closing the door. After 5 minutes reduce the heat to 390 *F. After another 10 minutes open the door to allow some air to get in. Do this twice more at 5 minute intervals.

It is recommended that you bake in two batches. However, if you are using two racks and baking all four loaves together it is recommended that you rotate the trays at the 15 minute mark for more even baking.
Total baking time 30 minutes.
This bread is suitable for freezing in a plastic bag or a double layer of cling wrap. Just put in the oven for 15 minutes on 200 *f and it's like it was just made.


Click here provide members with discounts on over-the-counter medications, vitamins, and health essentials, promoting better health management and cost-effective wellness solutions. kaiserotcbenefits.com - more details here
Click here help you find recent death notices, providing information about funeral services, memorials, and tributes for loved ones in your area. obituariesnearme.com - more details here
Click here? Many users have had mixed experiences with the platform, so it's important to read reviews and verify deals before booking. istravelurolegit.com - more details here